How to Check Your PC Specs in Windows 11 (The Easy Way)
Need to check your PC’s specs in Windows 11? This quick and easy guide shows you how to find details about your processor, RAM, graphics card, and more—no tech skills needed!

Have you ever found yourself wondering "How much RAM does my computer have?" or "What processor is inside this thing?" Don’t worry — you’re not alone!
Either you’re installing a new program, purchasing or selling your system, or just being curious, it’s super exiting to know what your computer is packing under the hood. And the best part? You don’t need to be a computer expert to check — it only takes a few clicks.
Let me take you step by step.
Watch on YouTube
How to Check Your PC Specs in Windows 11 (The Easy Way)
Step 1: Open Your Settings
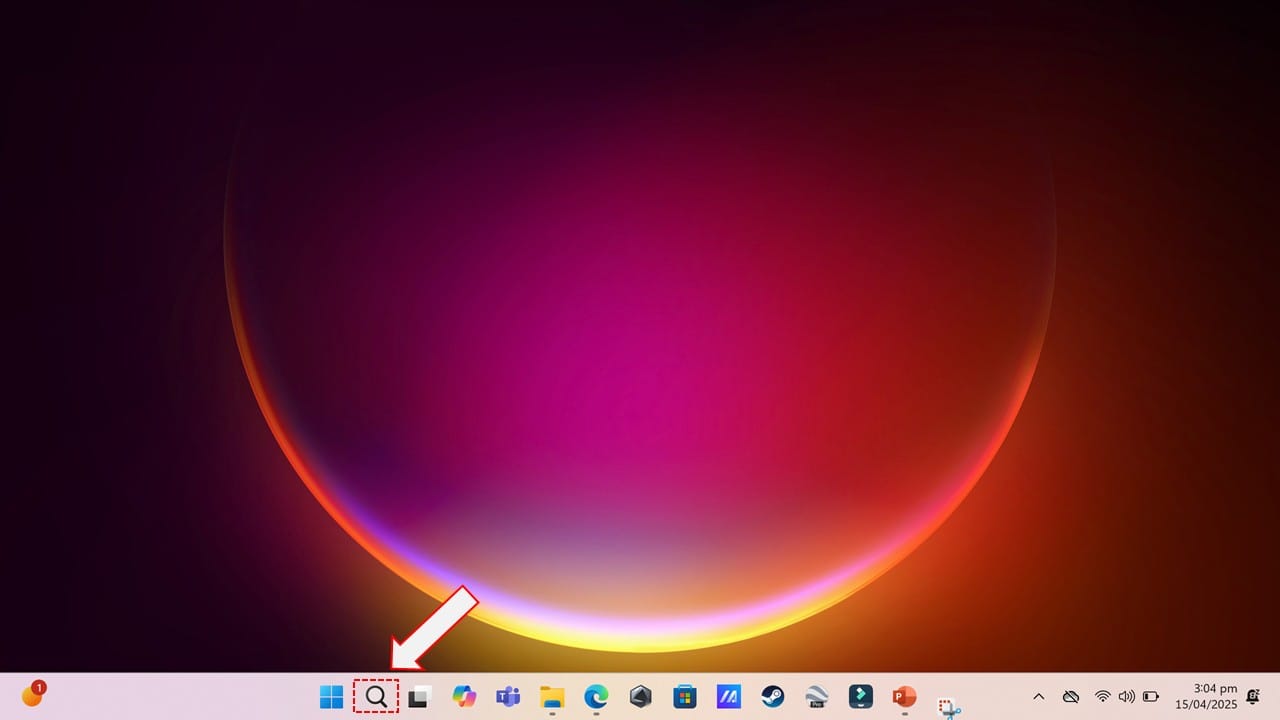
First, click the little search icon (the magnifying glass) on your taskbar.
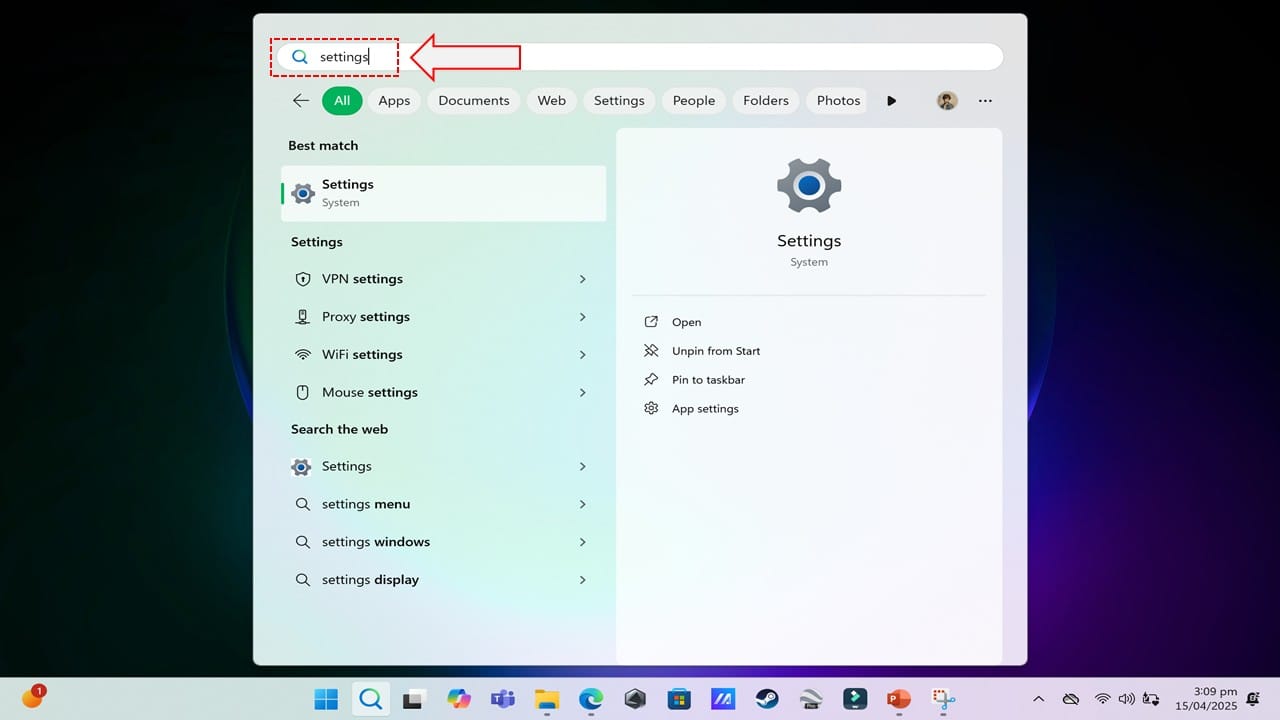
Type “Settings” and hit Enter. That’ll take you straight to the main settings menu.
Step 2: Head to the “System” Section
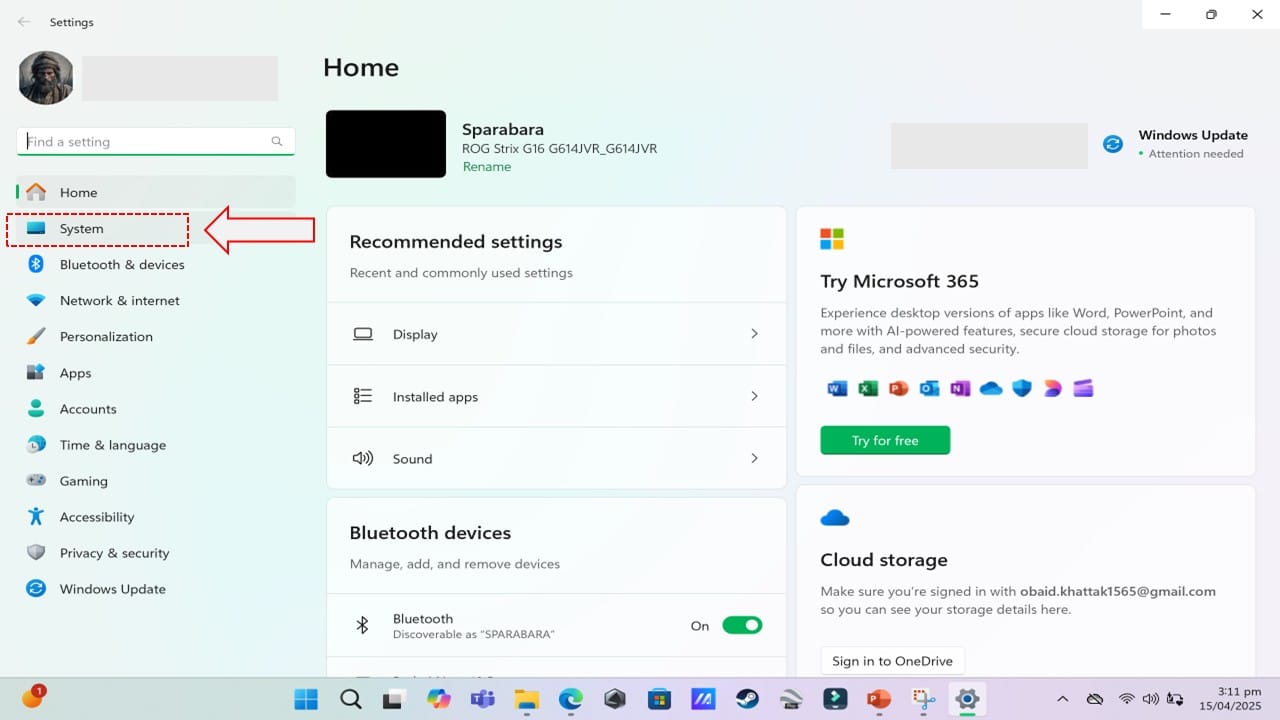
Once you’re in Settings, click on “System” in the left-hand menu. This is where all your core device info lives.
Step 3: Scroll Down to “About”
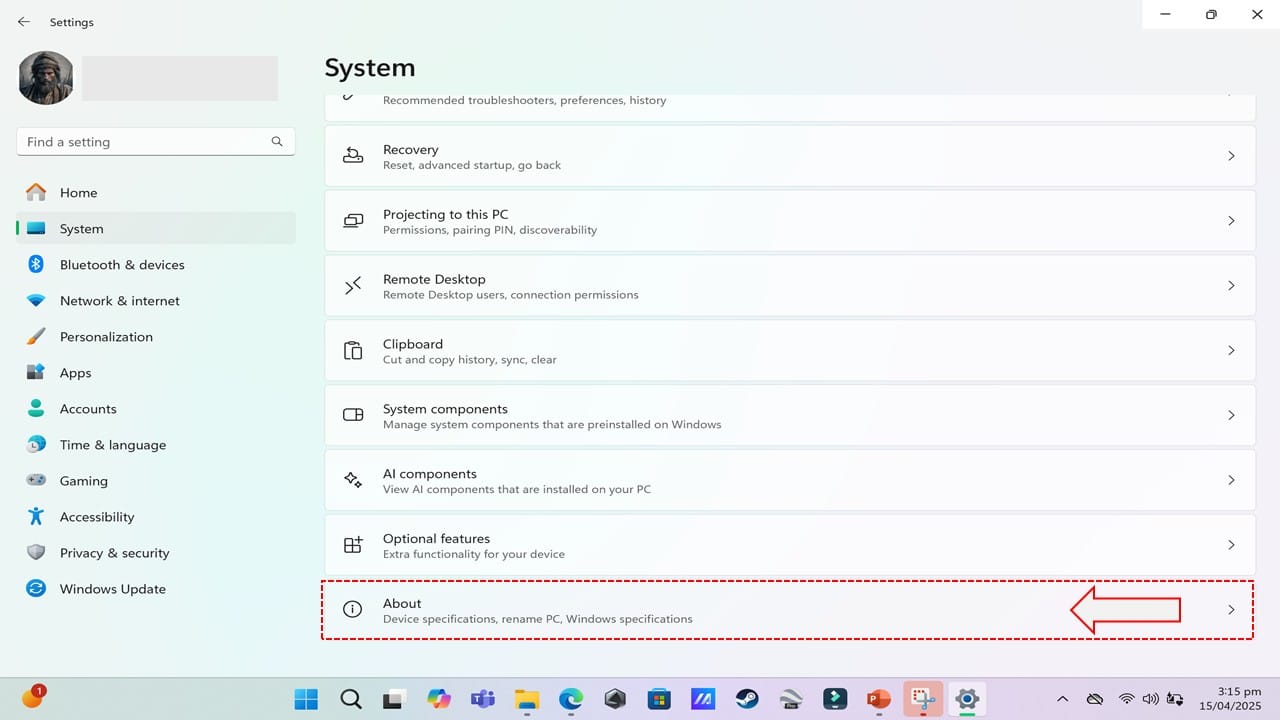
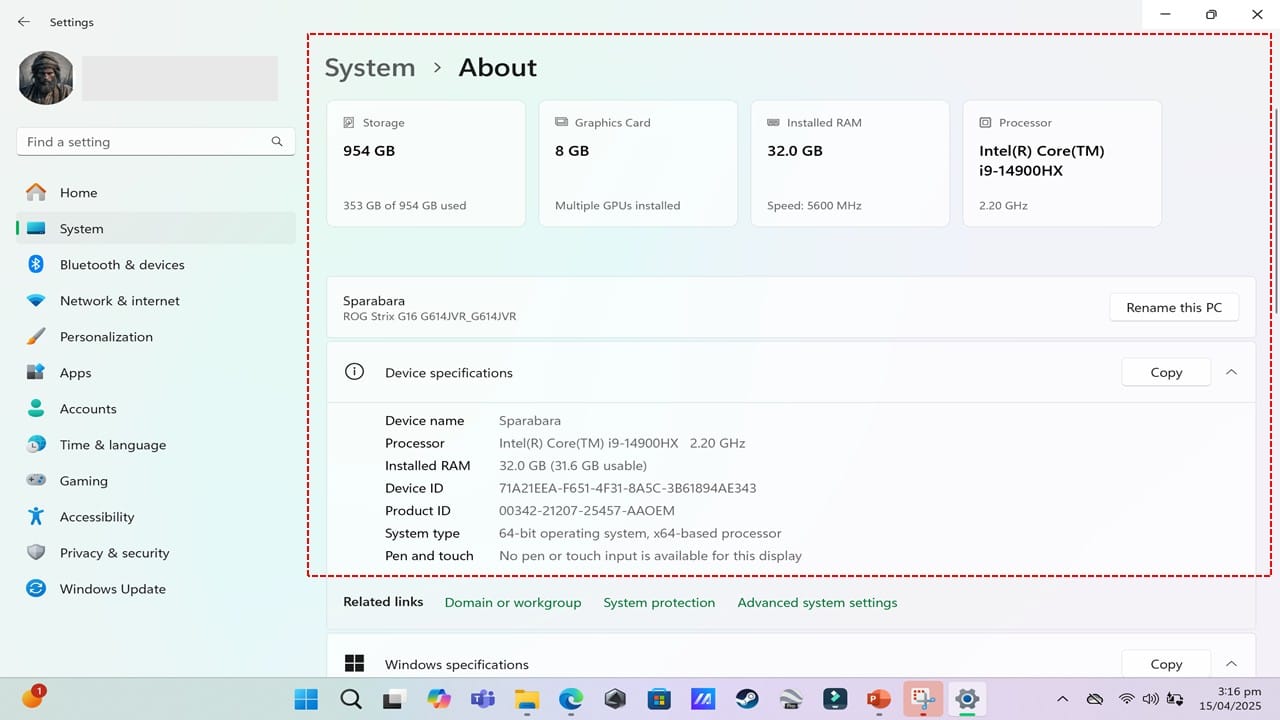
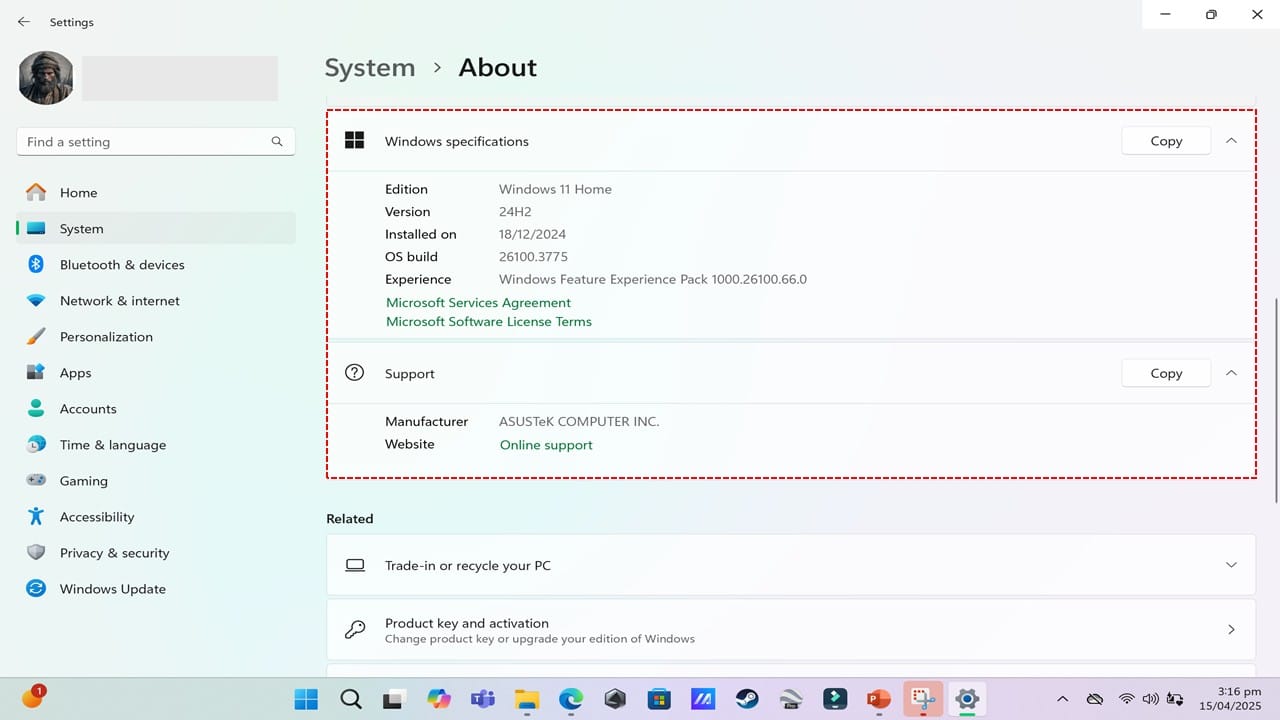
Now scroll to the bottom and click on “About”. This is your go-to page for everything about your computer.
What You'll Find Here:
You’ll see details like:
- Your Device name (great if you have multiple PCs)
- The Processor you're using (like Intel or AMD)
- How much Installed RAM you’ve got
- Whether your system is 64-bit or 32-bit
- And even your Windows version
Basically, it’s your computer’s resume!
Easy, right? In less than a minute, you’ve learned how to check what your PC is working with. No extra apps, no tech headaches — just built-in tools and a few clicks.
If this guide helped you out, feel free to share it with a friend, or if you have any questions — I’m always here to help!
Comments ()